TurboLayer DIY NAS Tutorial
- 2
The Linux Command Line Approach
Follow this tutorial if you are proficient in Linux, adventurous, and have a Raspberry Pi (compatible models listed on the previous page) and some hard disks gathering dust.
Items needed:
- TurboLayer Cable with Power Supply Module x 1 unit
- Raspberry Pi (compatible models listed below) and Power Supply
- 32GB microSD card
Preparing the OS image on the micro SD card
Download the Raspberry Pi OS with desktop on the official Raspberry Pi site.
Look for the version:
Release date: November 19th 2024
System: 64-bit
Kernel version: 6.6
Debian version: 12 (bookworm)
Size: 1,179MB
Follow the steps in Raspberry Pi Imager. It is the quick and easy way to install an operating system to a microSD card ready to use with your Raspberry Pi.
Before you power up
Check that the Harddisk Docking Station is plugged in the Raspberry Pi.
Check that your cables are connected correctly.
Check that the micro SD card is properly inserted.
Connect the mini HDMI cable from the motherboard to the TV/monitor.
Power up if everything looks OK.
Power up and get your Raspberry Pi online
If you have skipped the WiFi setup during the system configuration during the initial boot up, you can do it now by moving the mouse to the top right hand desktop screen. Click on the wireless icon then choose the WiFi network name and enter the its secured password.
Open the LXTerminal and update your system
sudo apt update
sudo apt upgrade
That should be enough for the Raspberry Pi preparation.

Verify the presence of the external harddisk drive
sudo fdisk -l
you would expect to see /dev/sda1 at the bottom of the command response.
To install SAMBA
sudo apt-get install samba samba-common-bin
To create a place where you store your files
sudo mkdir /home/pi/myCLOUD/shared
Modify the Samba configuration file for sharing folder
sudo nano /etc/samba/smb.conf
In addition, just below the authentication section of the file, paste this following line:
security = user
Within this file, add the following to the bottom. This text defines various details of share.
[myCLOUD]
path = /home/pi/myCLOUD/shared
writeable=Yes
create mask=0777
directory mask=0777
public=no
Now that we are done with the changes made to the file, we will now save it by pressing CTRL + X then Y and hit ENTER.
[myCLOUD]: This defines the address and other configurations related to the shared folders. For example, the shared folder will be abe the following address: \\raspberrypi\myCLOUD.
Make a user for Samba on the Raspberry Pi
sudo smbpasswd -a pi
If you wish to create additional users, key in the following commands:
sudo adduser username
sudo smbpasswd -a username
Lastly, to get the Raspberry Pi local IP address
hostname -I
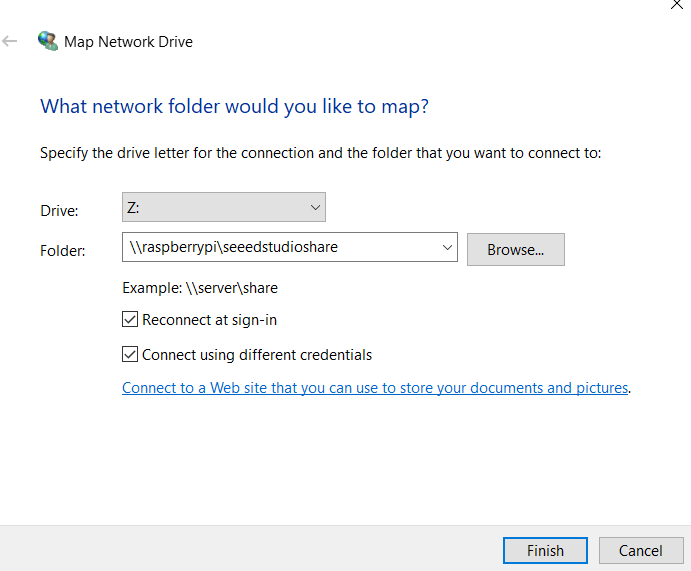
Write down the IP address. Let's say the IP address is 192.168.1.111 for the following MAP Network Drive illustration.
Connecting Samba Server on Windows 11 / 10
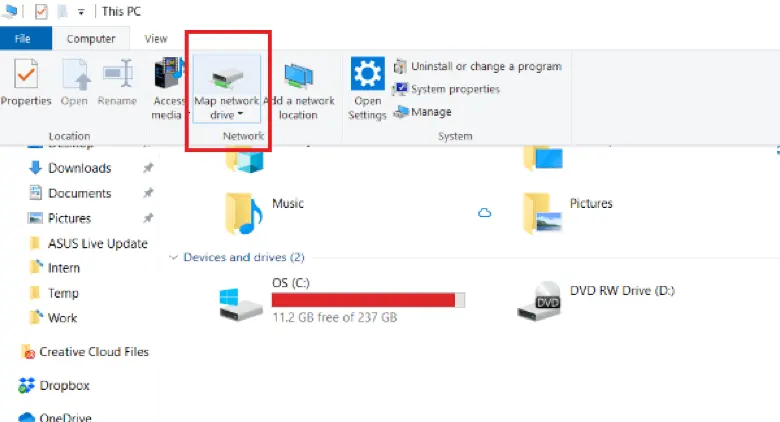
Go to Map Network Drive
- To access files and folders on Windows system, we have to put the address of the shared media. You can do this by going My Computer and click Map Network Drive
- Drive = Z (or any other unoccupied driver letter on the pull down manual)
- folder = \\192.168.1.111\myCLOUD
- Click FINISH, then
- Login as pi and key in the password
End of tutorial.
- 2