TurboLayer Cable
Benefits of the TurboLayer USB 3.0 to SATA III Cable
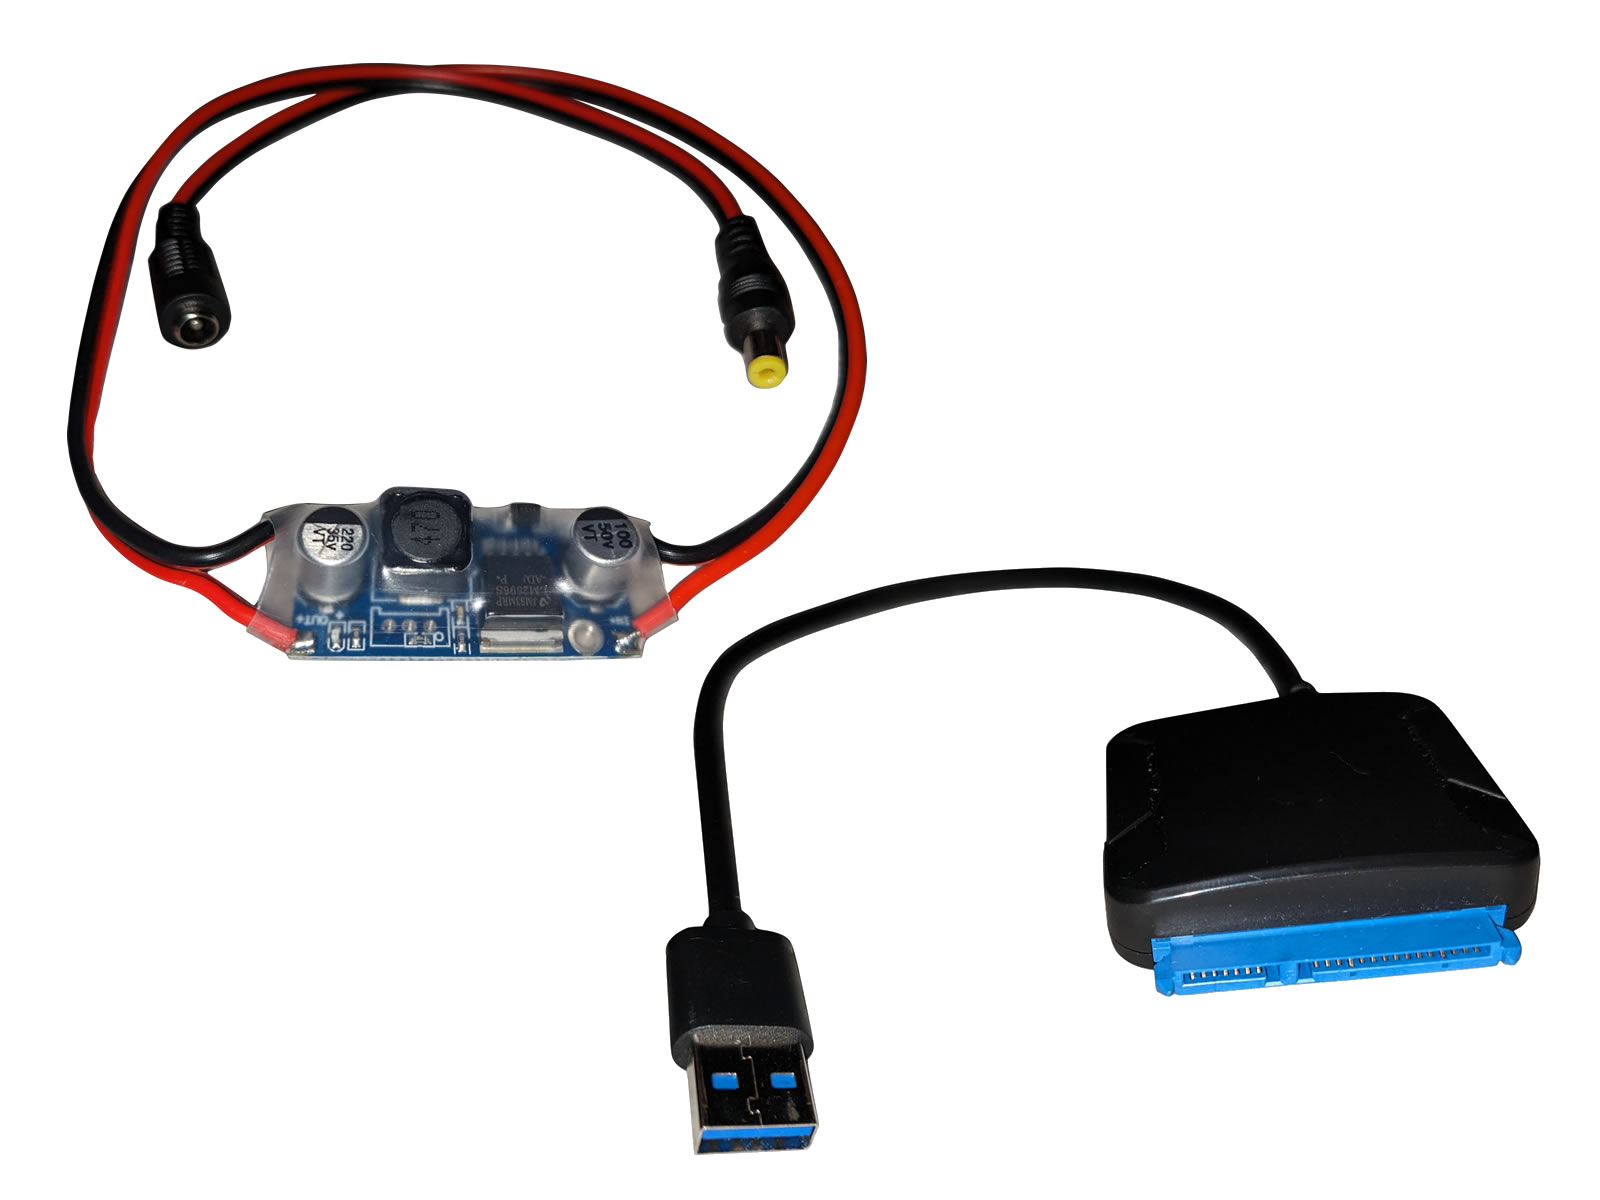
Commonly referred to as the TurboLayer Cable.
- High-Speed Data Transfer: Leverages USB 3.0 technology to deliver transfer speeds of up to 5 Gbps, significantly reducing the time needed for backups, file transfers, and system cloning.
- Broad Compatibility: Compatible with SATA III, SATA II, and SATA I devices, making it versatile for use with HDDs and SSDs of various generations.
- Plug-and-Play Convenience: No need for additional drivers; simply connect the cable to your computer or Raspberry Pi and start accessing your storage immediately.
- Lightweight and Portable: Compact design ensures easy portability, allowing you to carry it wherever you need quick storage access or upgrades.
- Wide Application: Perfect for creating external storage, upgrading a laptop with a new SSD, recovering data from old drives, or building DIY solutions like NAS, VPN servers, or media centers.
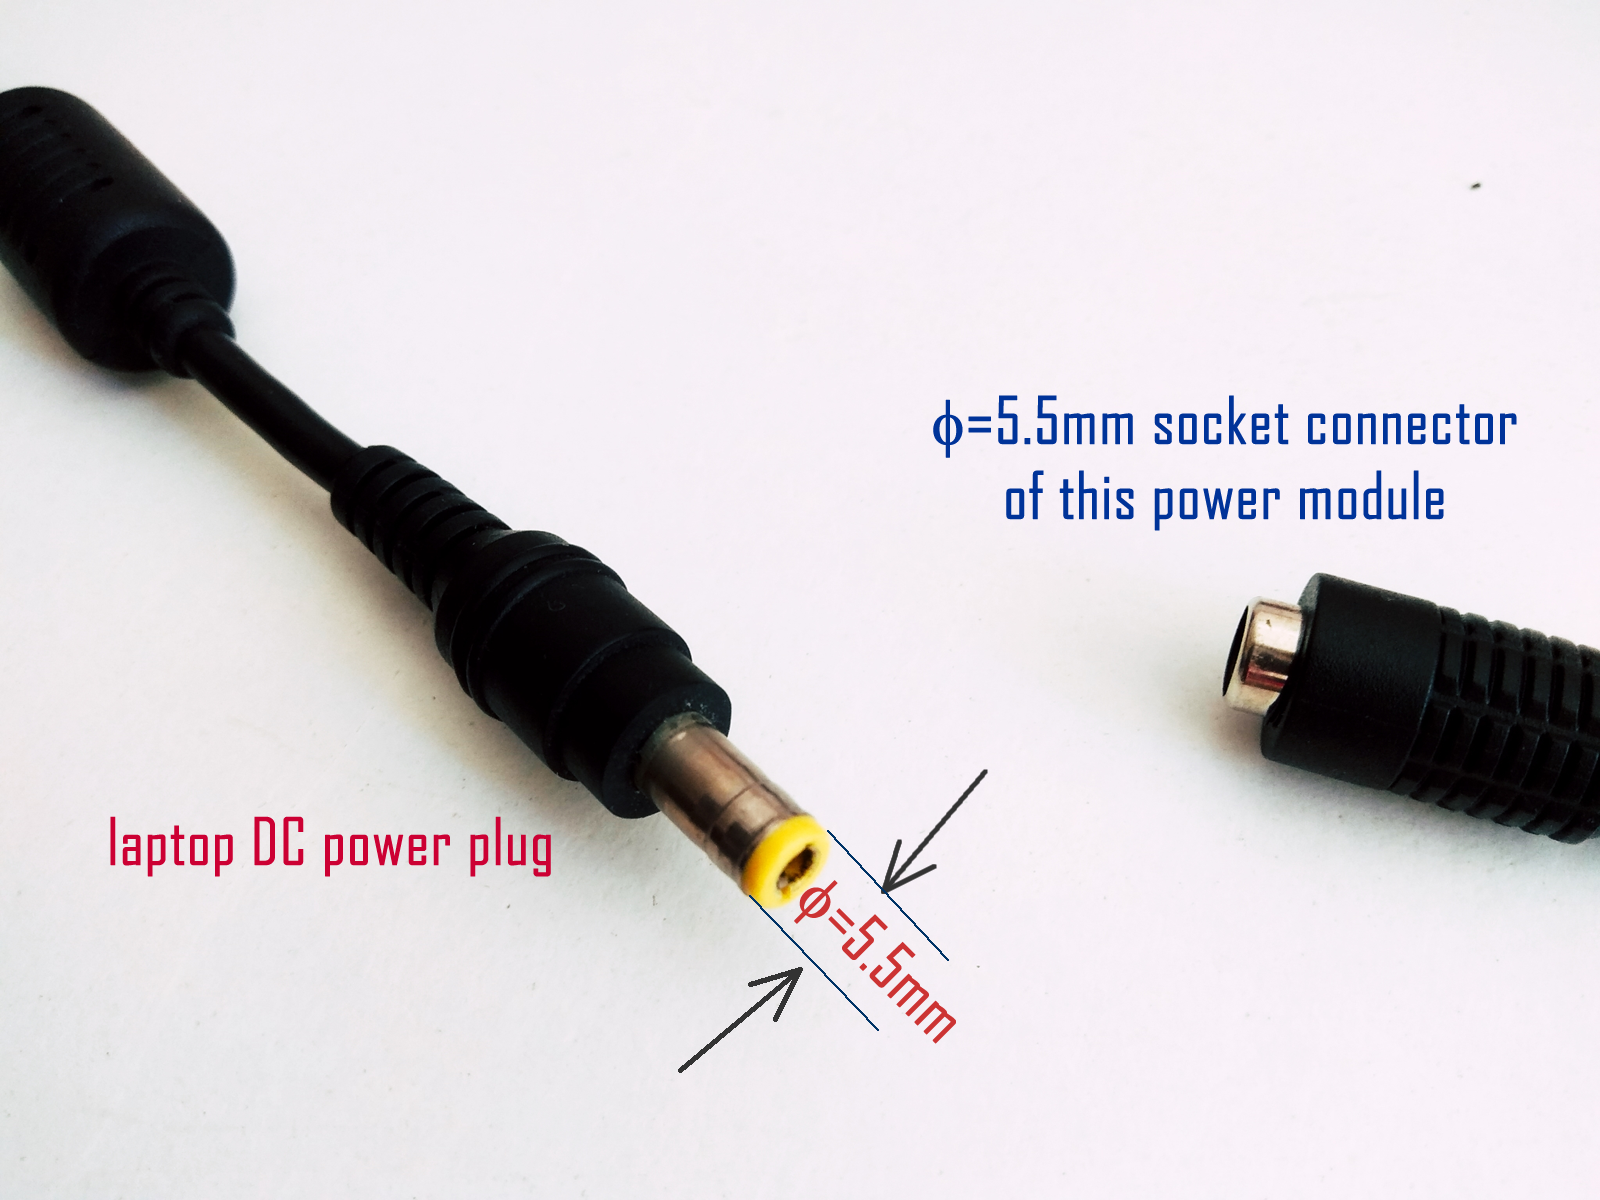
- Integrated Power Supply Module: Includes a built-in power module capable of powering 3.5" HDDs directly, compatible with 5.5mm DC plug of most laptop power adapters.
- Enhanced Durability: Built with high-quality materials to withstand frequent plugging and unplugging, ensuring longevity.
- Supports Advanced Features: Fully supports UASP (USB Attached SCSI Protocol), which improves speed and efficiency for SSDs by reducing latency and CPU utilization.
- Ideal for DIY Enthusiasts: Tailored for projects like the TurboLayer NAS DIY Kit, enabling seamless integration with Raspberry Pi setups to create robust, high-performance network storage solutions.
- Cost-Effective Solution: Offers a budget-friendly way to reuse older SATA drives, giving them a new life as external storage or part of innovative DIY builds.

The package includes:
- TurboLayer Cable x 1 unit
- Power Supply Module for the TurboLayer Cable x 1 unit
How to Set Up the TurboLayer Cable with a Computer?
Setting up the TurboLayer USB 3.0 to SATA III Cable is straightforward and allows you to connect a SATA drive to your computer for seamless access. Follow these steps:
- Connect the SATA Drive: Attach your 2.5" or 3.5" SATA hard drive or SSD to the TurboLayer Cable using the SATA interface.
- Power the Drive:
- For 2.5" SATA drives: Power is supplied directly through the USB connection.
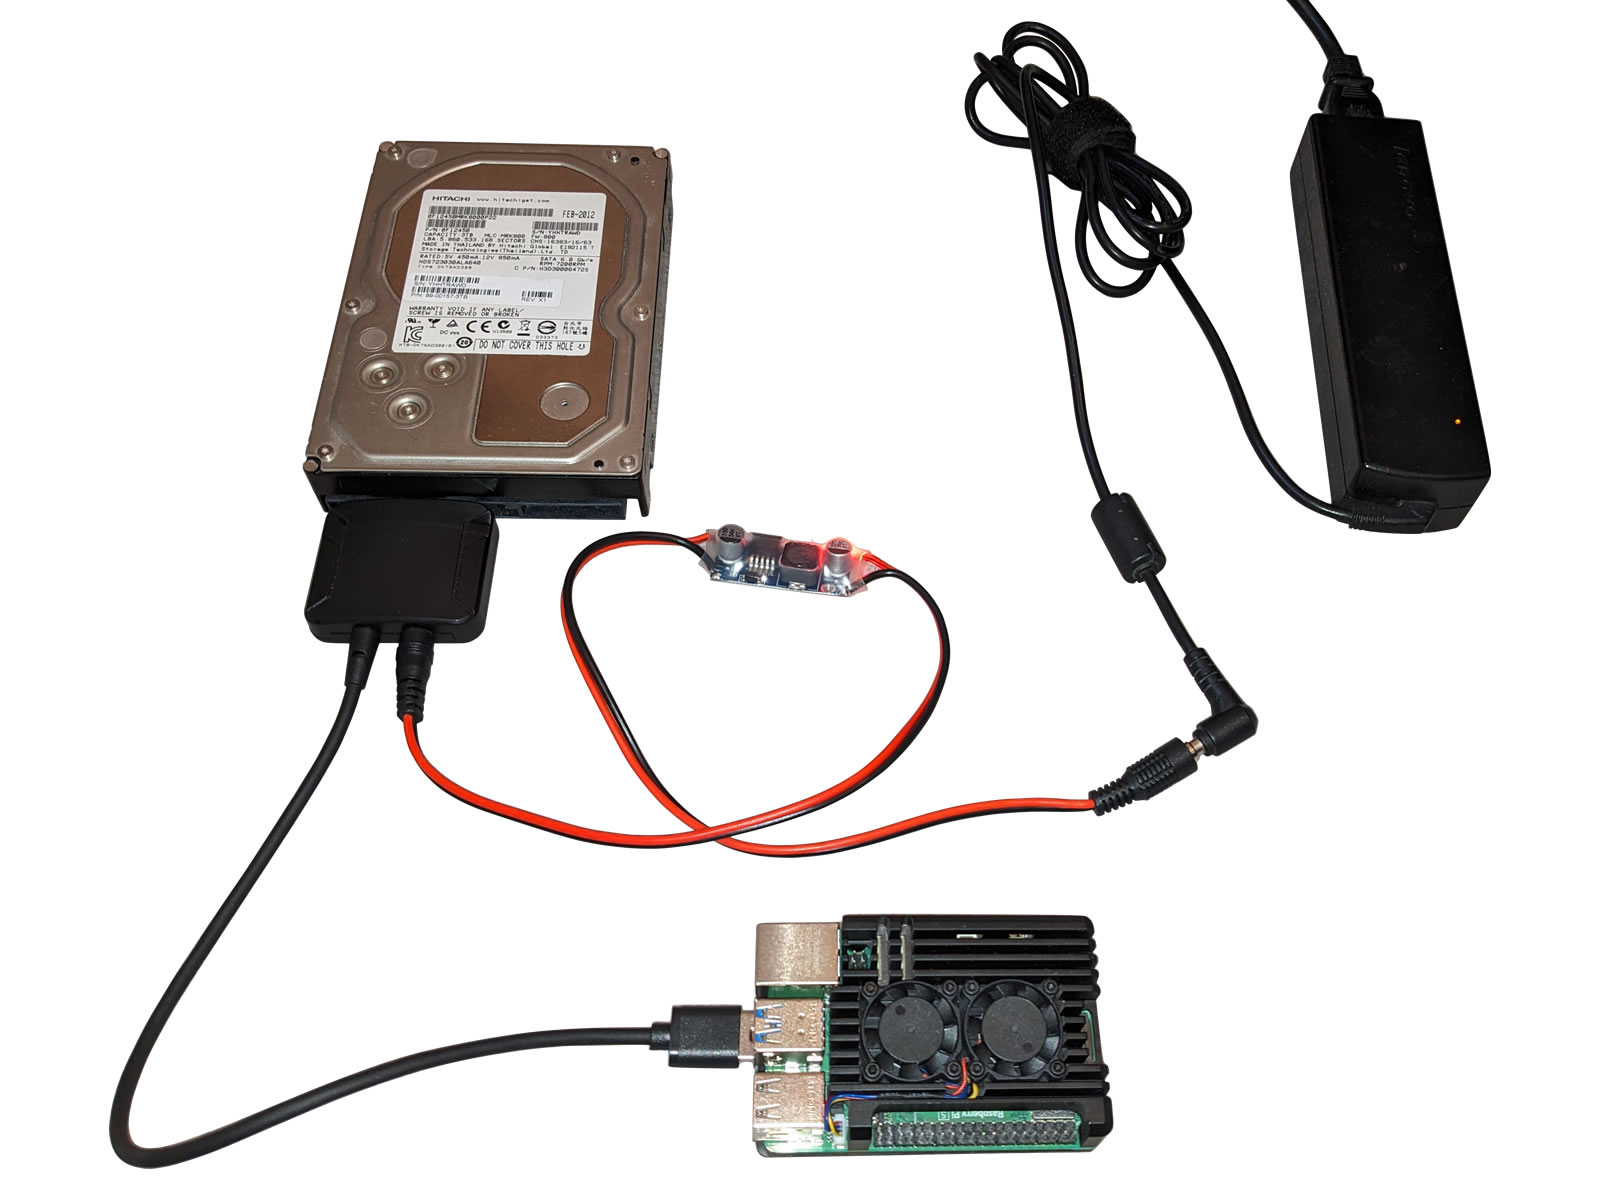
- For 3.5" SATA drives: Use the included Power Supply Module to provide additional power required for proper operation.
- Connect to Computer: Plug the USB 3.0 connector into an available USB port on your computer.
- Verify Detection: Ensure your computer recognizes the drive. It should appear as an external drive in your file manager or disk management tool.
- Start Using Your Drive: You can now access, transfer, or manage your data with high-speed USB 3.0 performance.
With the TurboLayer Cable and Power Supply Module, you can effortlessly connect and power 3.5" drives for reliable and efficient data storage or transfer.
How to Set Up the TurboLayer Cable with the TurboLayer NAS?
Setting up the TurboLayer Cable with your TurboLayer NAS is a straightforward process. Follow these steps to ensure a seamless setup:
- Prepare Your Components: Ensure you have the following:
- TurboLayer Cable x 1 unit (for setting up your NAS)
- Power Supply Module for the TurboLayer Cable x 1 unit (required for powering a 3.5" HDD)
- Raspberry Pi model 5 or compatible model
- HDD or SSD for storage
- Connect the TurboLayer Cable: Attach one end of the TurboLayer Cable to your HDD or SSD. Ensure the connection is secure.
- Connect the Power Supply Module: Plug the Power Supply Module into the TurboLayer Cable to provide power, especially if you're using a 3.5" HDD. Ensure the module is connected to a power source.
- Attach to the Raspberry Pi: Connect the other end of the TurboLayer Cable to the USB 3.0 port on your Raspberry Pi.
- Power On: Turn on the Raspberry Pi and ensure the HDD/SSD powers up successf
Copyright © All rights reserved | TurboTenna is a registered trademark of Datacom Network Ltd.
Designed By danets based on HTML Codex Template

